- Click the Placeholder tab.
-
Click the  button to create a new placeholder. The Create New Placeholder dialog box appears.
-
Enter a Placeholder Name. When you are finished creating your placeholder, the Placeholder Name will display in the Placeholder grid located in the Placeholder tab.
-
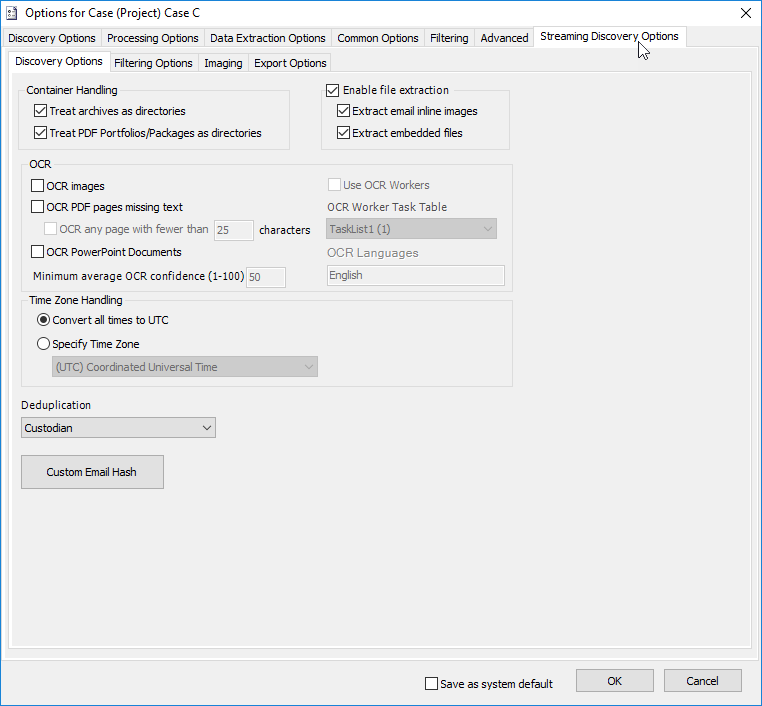
Select the check boxes next to the File Types/Extensions for which you want to have placeholders when a Streaming Discovery Imaging Job runs. By default, all File Types/Extensions are unselected.
- Click Select All to select all file types.
- Click Clear All to clear the selections and individually select the desired file types.
-
Expand a file type to view its subcategories. Filtering may be done on specific subcategories of a file type.
eCapture recognizes documents by their actual content and not the file extension. Keep this in mind as you exclude/include file types. You can filter (exclude) a myriad of file types by simply ensuring that the File Types/Extensions are unselected. When the Job runs, it will create placeholders for only those file types that are selected. These file types are based on the Oracle’s Outside-In identification criteria.
- If you want to add more file extensions to the placeholder definition you are creating, in the Placeholder these File Extensions list box, click
 to add the extension to the list. At least one file type or category must be selected. Repeat this step for each extension. File extensions are automatically alphabetized.
- If you want to remove a file extension, in the Placeholder these File Extensions list box, select the extension and click
 .
.
- If you want to clear all the extensions from the list, in the Placeholder these File Extensions list box, click
 .
.
-
To import a list of file extensions from a CSV file, in the Placeholder these File Extensions box.
- Click
 .
.
- Select the CSV file.
- Click Open. An Import From File progress bar appears. If any errors were encountered during the import, such as duplicates, an Information dialog box displays with the errors. The CSV file may contain extensions with or without a "." (period). Ensure the CSV file contains only one column of file extensions with each extension occupying its own row, for example, Range A1 through A50 or Range E1 through E50. The file extensions are alphabetized as they are imported.
- Set the File Size parameters. The default setting is None. If specified, file sizes may be Over or Under a specified amount. The selected file size applies to the files in the Imaging Job that have sizes on disk that are either greater than or equal to, or less than or equal to, the size specified. The size is expressed in KB. For example, a 1 MB file is entered as 1024 KB.
- Select the Extract Text of Document check box to extract the document text. By default, this check box is cleared.
- Select the Apply Max Page Threshold check box and indicate a threshold value (1 to 10000) to limit the number of pages produced by larger files. By default, this check box is cleared. If the page threshold is reached, the items are flagged as Page Threshold Exceeded. All pages imaged up until the threshold is reached are included in the document. The first page is the Page Threshold Exceeded placeholder, and subsequent pages will be those that were processed within the Max Page Threshold setting.
-
To use a predefined placeholder:
- Click
 to display the Open dialog box.
- Select a placeholder image. File type options include JPG and TIF.
-
Click Open. The selected image displays in the view box underneath the option.
-
If you want to use a custom placeholder, click  .
.
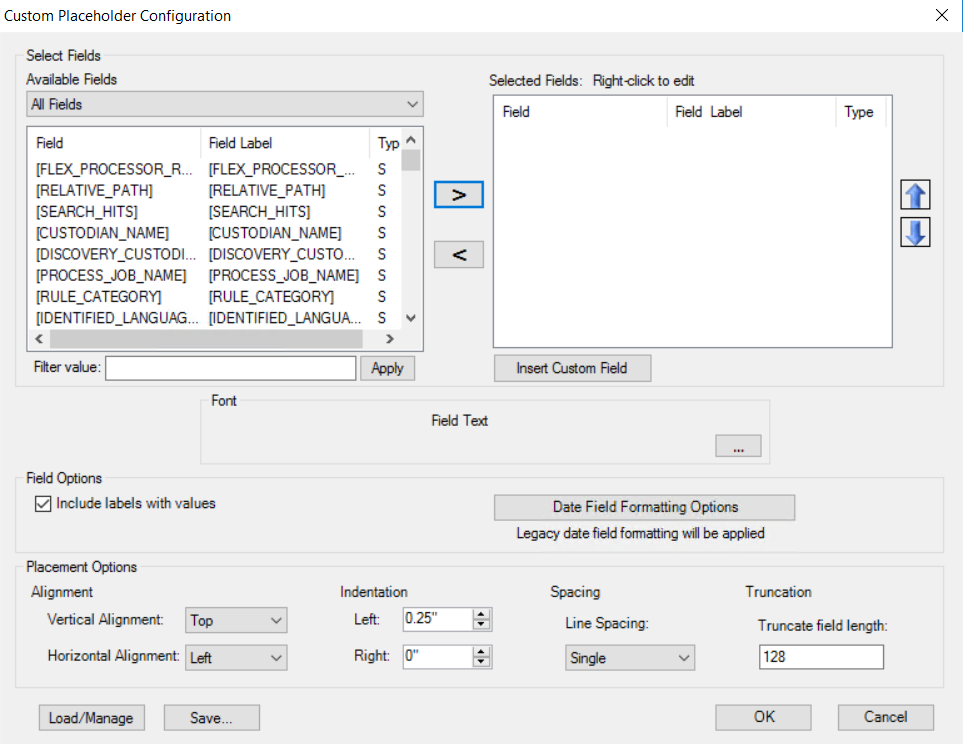
The Custom Placeholder Configuration dialog box appears.
Complete the necessary fields in the Custom Placeholder Configuration dialog box.
-
Click the drop-down menu located above the Available
Fields list and select a specific field type. By default, All Fields is
displayed.
-
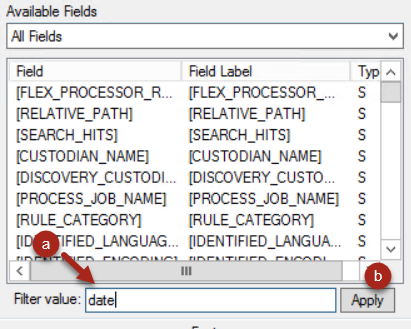
To narrow the field list:
- Enter a value in the Filter
Value field located below the Available Fields list. For example,
to see only those fields that contain the word “date”, enter date.
- Click
 .
.
- To display all
fields, delete the value (in this example, the word date), leaving the field empty, and click .
- Click
 to
move a selected field from the Available Fields list to the Selected Fields
list.
to
move a selected field from the Available Fields list to the Selected Fields
list.
- Click
 to
move a selected field from the Selected Fields list to the Available Fields
list.
to
move a selected field from the Selected Fields list to the Available Fields
list.
- Click
 to open the
Insert Custom Field dialog box in which you can create new group fields and new
user fields.
to open the
Insert Custom Field dialog box in which you can create new group fields and new
user fields.
- Use the
 and
and  arrows to change the
order of the fields in the Selected Fields list. Select a field (or contiguous
fields) and then use either arrow to reposition the selected field(s).
arrows to change the
order of the fields in the Selected Fields list. Select a field (or contiguous
fields) and then use either arrow to reposition the selected field(s).
-
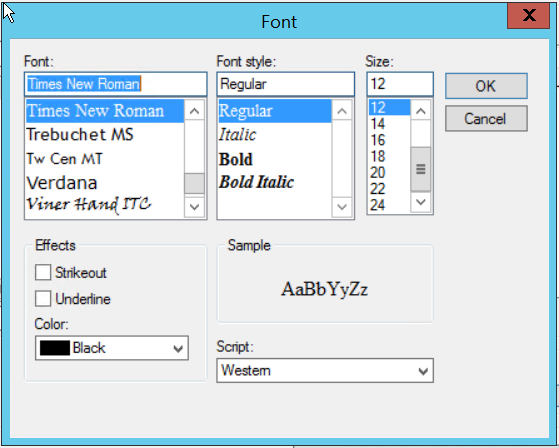
Select a field in the Selected Fields list. The selected
field appears in the Font section. Click  to open
the Font dialog box.
to open
the Font dialog box.
- Select the desired Font, Font Style, and Size; then click OK to return
to the Custom Placeholder Configuration dialog box. Repeat this step for each additional
field.
-
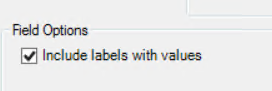
In the Field Options section, if necessary, select Include labels with values. When selected,
both the field label and its value are included.
-
Click  . The Date
Field Formatting Options dialog box appears.
. The Date
Field Formatting Options dialog box appears.
-
Select the Date Field Formatting and Time Format for the custom placeholder.
-
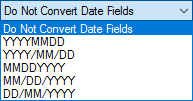
If you want to change the date field to a different
format, click the drop-down menu arrow and select from the following date formats:
-
YYYYMMDD
-
YYYY/MM/DD
-
MMDDYYYY
-
MM/DD/YYYY
-
DD/MM/YYYY
- Otherwise, select the option, Do Not Convert Date Fields.
-
If you want to change the Time Format, click the drop-down menu and select from the following options:

-
12-hour [displays time in 12-hour format e.g., 1:04]
-
24-hour [displays time in 24-hour format, e.g., 13:04]
-
Regional [formats the time according to the “default”
regional settings of the Worker on which the document is being exported.
|

|
Note: Changing the format strings by using the Customize button of
Regional Settings will have no effect; the actual region must
be changed to see any effect.
|
-
Select Resolve times to second precision if you want to
add seconds to all metadata date fields that have time. This does not
apply to the images.
- By default, the Legacy Date Field Formatting check box is cleared. Clear
this option to select from the Invalid date options and to select fields
for date format handling.
-
If you cleared the Legacy Date Field Formatting check box, set the Invalid date options:
- Treat date values outside of specified range as invalid dates - Select this check box and then select
a Start Date and End Date range. Any dates outside of the selected range
are considered as invalid dates. The start date default is set to
SQL minimum date. The end date default is set to SQL maximum date.
-
Choose one of the following options:
-
Invalid date field output value - enter text to display
if an invalid date is encountered. This field may be left
blank.
-
Invalid date field output do not convert - invalid
dates will be output as a text field.
-
From the Available Fields list, select the fields you want to use for date formatting and move them to the Fields Selected for Date Format Handling list. There are a few considerations about date fields to keep in mind:
-
The only fields that are not present in the list are *DATE_ONLY* and
*TIME_ONLY*. The fields in the Available Fields list comprise those
that are marked as valid for date formatting. This is determined by the
value of TRUE in the ExportAttemptDateParse field located in the EncounteredMetatdataFieldList
table.
-
Date field formatting options affect only those fields in the Fields
Selected for Date Format Handling list.
-
Date field formatting options are set at the Job level.
To select fields for date format handling.
-
Select a field for date format handling by selecting the field from
the Fields Available for Date Format Handling list and clicking  to move the single field to the Fields Selected for Date Format Handling list.
-
For two or more fields, Ctrl-click to select non-contiguous fields or
Shift-click to select contiguous fields. After selecting the fields,
click  to move them to the Fields Selected for Date Format Handling list.
eCapture creates two additional fields that “split” the date and
time into a Date Only field and a Time Only field. These two additional
fields are displayed in the Available Fields list in the Export Wizard,
Select Export Fields screen. For example, if the DueDate field was moved
to the Fields Selected for Date Format Handling list, the following additional
DueDate fields would display in the Available Fields list: DueDate*DATE
ONLY* and DueDate*TIME ONLY*.
- When you are finished setting the Date Field Formatting options, click OK. The Custom Placeholder dialog box appears.
-
In the Placement Options dialog box, select the placement settings for the placeholder.
-
Set the alignment positioning for the placeholder.
-
Vertical Alignment: Determines placement
along the vertical axis. Options include Top, Center, or Bottom. Top
is the default.
-
Horizontal Alignment: Determines
placement along the horizontal axis. Options include Left, Center,
or Right. Left is the default.
- Set the Indentation (Left and Right) for the placeholder. This setting determines the horizontal spacing to the left
or right of the page margins.
- Set the Truncation for the placeholder. Truncation determines the number of characters
at which the field value will be truncated. The default value is 128 characters.
-
If you want to save your Custom Placeholder formatting to a file, to be used later, click Save, enter a Description for the placeholder, and then click OK. You will also be prompted to save the custom placeholder definition before you exit the Custom Placeholder Configuration dialog box.
-
When you are finished creating the custom placeholder, click OK. The Save Changes dialog box appears.
- Click Yes to save the custom placeholder definition.
- Enter a Description for the placeholder.
-
Click OK.
-
Use the zoom in  or zoom out
  buttons to view the image before finalizing.
- To remove the selected image from the view box, click
 . The existing image must be removed before selecting a new image.
-
To exit the Custom Placeholder Configuration dialog box, click OK. The placeholder displays in the Placeholder grid.
|
|
Note: More than one placeholder may be created for the imaging job. When two or more placeholders exist for a Streaming Imaging job, rule functionality, similar to the Flex Processor, is used. Each placeholder’s document criteria selection is applied in placeholder order with the last placeholder rule (applied to the document) determining the processing output. The Placeholder rule order may be changed before starting the job.
|
-
The Description field will contain the following values based on the selected Placeholder criteria:
- File Types
- File Types, Extensions
- File Types, Extensions, File Size
-
File Types, File Size
To edit the Placeholder criteria, double-click the Description field of the desired Placeholder. The Edit Placeholder dialog box appears. Make the changes and click  to return to the Placeholder grid.
- To delete a Placeholder from the grid, click
 . A prompt displays to confirm the deletion. Click
  .
.
- To change the order of the placeholders in the grid, select a placeholder and click
 or
or  to move the selected placeholder into the correct position. Repeat this step for all placeholders until they are in the desired order.


 Streaming Discovery: Placeholder Options